The Triangular fibrocartilage complex (TFCC) is formed by the triangular fibrocartilage disc (TFC), the radioulnar ligaments (RULs) and the ulnocarpal ligaments (UCLs).
Anatomy of the Triangular Fibrocartilage Disc (TFC):
The TFC is a trianguar, biconcave (concave on both sides and thicker along its periphery) articular disc that sits at the distal ulna, between the ulna and the carpals. The central portion of the TFC is thin, and is made of fibrocartilage (the type of cartilage that is designed to withstand compressive loads; such as in the meniscus of the knee). Like in the knee, the inner portion of the TFC is poorly vascularized while the outer edge is well vascularized. For this reason, often internal tears never heal and the injury become chronic (or are a surgical and not a rehab concern).
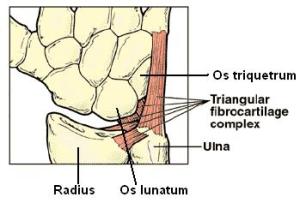
Note the integration of the disc with the ligaments
The TFC is attached to the wrist joint by the radioulnar and ulnocarpal ligaments (as well as smaller ligaments that attach it directly to the lunate and triquetrum bones). These ligaments are also stabilizers of the wrist. For this reason, any tear in the TFC or the TFCC (the disc plus the ligaments) often leads to instability in the wrist – a common problem with gymnasts that often requires bracing that compresses the radius and ulna and limits extension (tiger paws, pegasus wrist supports, etc).
The primary functions of the TFCC:
- To support the ulnar portion of the wrist by increasing congruence between the ulna and the proximal row of carpals.
- Load transmission across the ulnocarpal joint (partially load absorbing between the ulna and the carpals)
- Allows forearm rotation by giving a strong but flexible connection between the distal radius and ulna.

 How is the TFCC injured?
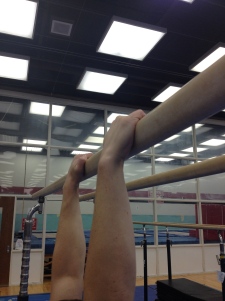
As mentioned above, the TFCC complex stabilizes the wrist at the distal radioulnar joint. It also acts as a focal point for the force transmitted across the wrist along the ulnar side during weight bearing activities. Traumatic injury (such as a fall onto an outstretched hand) is the most common mechanism of injury. The hand is usually in a pronated or palm down position. Tearing or rupture of the TFCC occurs when there is enough force through the ulnar side of the overextended wrist to overcome the tensile strength of this structure. (Sounds like most tumbling skills right?) The TFCC is also at risk with gripping or tensile loads (as seen when using a power drill that suddenly binds up or with gripping and pulling – such as many bar/ring skills) and can be torn this way as well.
In gymnastics however, the TFCC can also be injured through overuse injury (both support skills and hanging elements). As the wrist has evolved over time and is no longer designed for true weight bearing activities, the TFCC is smaller and thinner than analogous cartilage discs (such as the meniscus) in the lower extremities (legs). With repetitive weight bearing (both compressive and tensile), this area can become inflamed and tendonitis/tendonosis can develop in the anchoring wrist ligaments (often misdiagnosed as a wrist sprain). The subsequent inflammation can irritate the TFC, causing it to swell and/or weaken overtime. This causes subtle breakdown in the structure (as well as in the adjacent ligaments) that can lead to a traumatic tear with less force than required for a healthy TFCC.
Symptoms: (aka: why you’re really here…)
The symptoms of an injury to the TFCC are relatively simple, though they are often misdiagnosed as a wrist “sprain.” (Most non-orthopedics will use the term “sprain” as a catch-all for traumatic wrist pain that is not a fracture).
Primary symptoms:
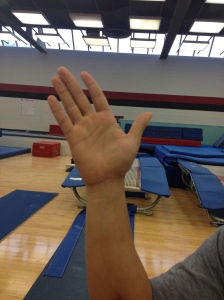
The main symptom is ulnar wrist pain (pain along the pinky side of the hand). In most cases it is right along the joint line, though some people will complain of “diffuse” wrist pain (a general pain that exists throughout the wrist joint). Often this pain is increased with weight bearing activities on the wrist (handstands or hanging) and rotation of the wrist (such as turning a doorknob or lifting a heavy pan with one hand). There is also often tenderness to the touch along the ulnar side of the joint.
Secondary symptoms:
Some other possible symptoms include: swelling in the area, clicking or popping in the joint (aka crepitus) and weakness (usually due to pain inhibition).
Differential diagnosis: (aka ruling out other more serious conditions)
The biggest concern for a gymnast would be ruling out a fracture. A fracture at the end of the ulna would present with similar symptoms. The biggest difference is that with a fracture supination and pronation (twisting) of the forearm would also be greatly limited, if not blocked due to an ulnar dislocation. If you (or a gymnast that you coach) is unable to twist the forearm without significant pain, my best recommendation is to send them for an x-ray to rule out the fracture.
Diagnosis:
While it’s best to leave the diagnosing to the professionals, there are some quick tests that you can do to differentiate a TFCC injury from general wrist pain.
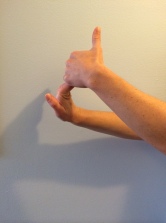
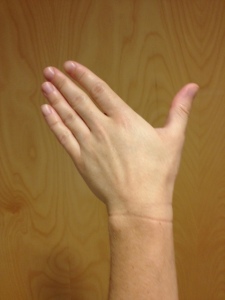
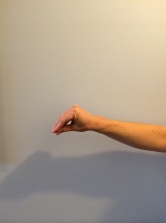
- TFCC provocation test: Hold the gymnast’s hand upright and neutral. Then perform ulnar deviation (tilt the hand toward the pinky) slowly. A positive test (meaning you have a TFCC injury) is pain along the ulnar side of the joint. A negative test (no injury) is reaching the end of the motion without pain.
Starting position
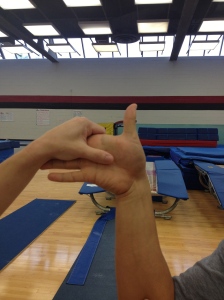
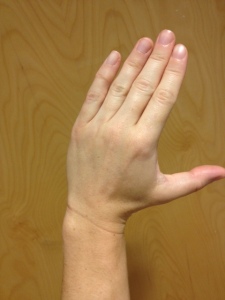
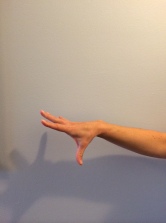
The hand is passively tilted toward the pinky until end range. A positive result is pain.
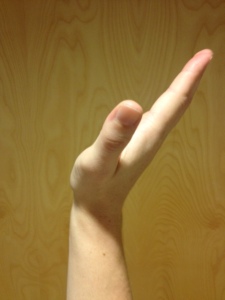
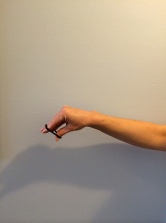
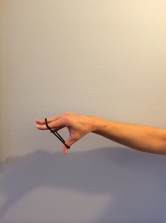
- Fovea sign: Apply external pressure to the area of the wrist along the fovea of the ulna. This is the space along the end of the ulna along the lateral side of the joint. Compare this to the other side. If there is pain with pressure, the test is considered positive (This is a highly sensitive, newly approved test BUT does not rule out fracture so be warned).
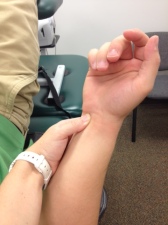
Pain under the examiner’s thumb with pressure is a positive test
Treatment:
Treatment depends largely on the severity of the tear and how limiting it is to training and activities. Like any ligamentous injury, a TFCC tear can be separated into grades I-IV (with grade I being mild, no permanent tearing; and grade IV being a complete rupture of the involved ligaments). In the less severe cases, the ligaments will slowly heal (as they were not completely torn) and normal function can be regained. In the more severe cases (grade III – IV), surgery is an option to re-stabilize the TFCC and the wrist joint. This is due to the fact the fully torn ligaments (and cartilage) do not actually regenerate to heal themselves. Rather then will “scar down” as the body lays down additional collagen (connective tissue) in an effort to “patch” the injury. Only a doctor (orthopedic) will be able to formally grade the injury, so if there is a severe disruption in function, it is this author’s recommendation that medical intervention be sought out. (There is a great deal of information about surgical repair online, however this is not the focus of this article)
Acute (early inflammatory phase): within 2-4 weeks after the initial injury
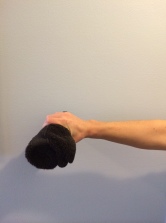
In all cases, during the initial inflammatory period rest (so no gymnastics), ice and immobilization are the recommended protocols. The best position for the injured wrist is in a neutral position (see below) and supported by a brace. The brace should be worn during daily activity to protect the wrist, and removed to allow for gentle movement and ice. The type of brace is non-specific, but during this acute phase, should support the wrist and the hand (by wrapping around the thumb).
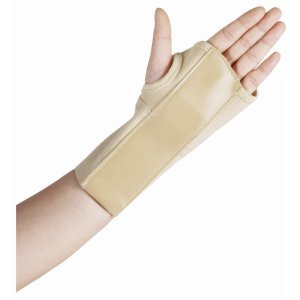
One of many options for bracing the wrist during the acute/inflammatory phase
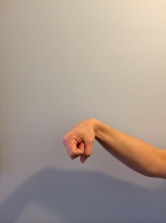
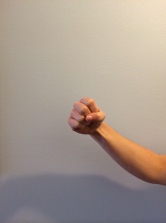
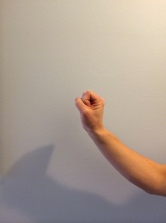
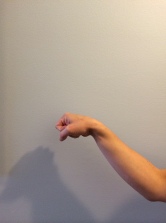
While the wrist is braced during activities of daily living, it is important to do gentle mobility exercises and hand motions to ensure that no motion is lost and to assist in the elimination of swelling. These exercises include: wrist circles, gentle wrist range of motion, towel squeezes (can also be putty squeezes), and opening and closing the hand into and out of a fist. (For a detailed view of these exercises, see “Beginning Exercises for the Wrist”)
During this time it is also important to ice the wrist periodically. This can be done with a gel pack, bag of frozen peas, or a Ziploc bag of ice cubes. Be sure to put a thin towel layer between the skin and ice, and only leave the ice on for 15 minutes at a time. This should be done 4-5 times a day, to deal with swelling and help to alleviate pain.
After the inflammatory phase:
While there is no way to know for certain (without the hands on assessment of a professional) whether or not the injury has progressed beyond the acute or inflammatory stage, a general guide that can be used is the return of full, pain-free motion. At that time, it is prudent to progress to some light weight bearing and more resistive exercises (see “Intermediate Exercises for the Wrist”). It is also important to consider functional bracing to protect the injury and to minimize pain until full strength is regained.
Functional Bracing:
Not every TFCC injury or wrist instability can be completely rehabilitated with exercise alone (especially during the first month or two). Often functional bracing (bracing during activity to support the instability) can allow a gymnast to continue to train while still protecting the newly healed TFCC (which will remain fragile until about the 6 month mark).
There are many braces on the market. Here are some details about three that have been used in the sport with success. (They are listed in random order – not a numerical rating system).
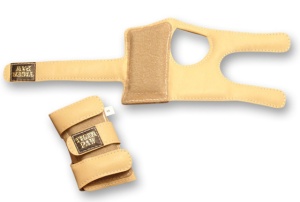
- Tiger Paws (aka Golden Paws): These are a more rigid wrist support (though now they do offer different inserts to vary the stiffness) that cover the wrist part of the hand. Their purpose is to limit wrist extension/ulnar deviation. In the case of a TFCC injury, they are very effective at protecting it once healed as they restrict the position that place the most stress on it. The negative: they cover a portion of the hand and some gymnasts find that uncomfortable on balance beam.
 2. Pegasus wrist supports: This brace compresses the radius and the ulna which providing a small block against end range extension and ulnar deviation. The big difference between this brace and golden paws is that the Pegasus wrist supports do not cross onto the hand. Some gymnasts may find this more comfortable – especially on balance beam (plus they can be used at the lower levels on parallel bars). The negative: they do not support as completely as the Tiger Paws for TFCC because they do not block end-range extension fully.
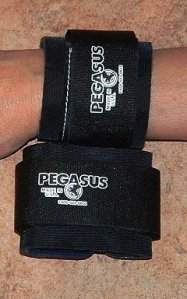 3. Wrist Widget: This is a newer style of brace and is more minimal in its design. It was specifically designed for TFCC injuries and has been marketed for athletes, weekend warriors, and regular folks alike. Like the Pegasus wrist brace, it compresses the ulna and the radius for support. It does not restrict motion in any way, but rather supports the distal radioulnar joint so that the connecting ligaments of the TFCC are not as “stressed.” In the gymnastic world this offers a minimalist way to brace the wrist that is still effective at protecting the TFCC and decreasing pain.
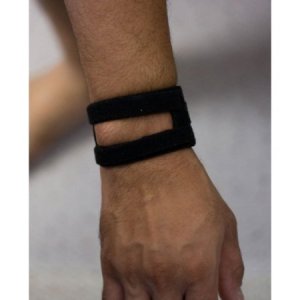
Summary:
- The TFCC (Triangular Fibrocartilage Complex) is composed of a disc (similar to the meniscus in the knee) and several adjacent ligaments on the ulnar side of the wrist. It supports the ulna and maintains joint space in the wrist during weight bearing (both hanging and support activities).
- Injury is caused by trauma (usually into compression or strong traction) and in gymnasts, overuse.
- Treatment involves rest, ice, stretching/strengthening, and functional bracing. It is key to allow the injury to rest during the inflammatory (acute) stage to minimize the risk of chronic pain.

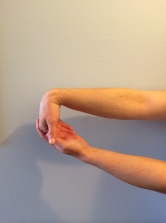 Extension: With the fingers relaxed, grab the palm and pull the wrist and hand up (into extension) until a stretch is felt in the bottom of the forearm/wrist (in the flexor muscles). Hold this for 30-45 seconds. Be sure to avoid pain. To increase the intensity, grab the fingers and pull (they will now be in an extended position thus putting more of a stretch on the flexor muscles).